
We're living in the age of remote work, online education and virtualization. Therefore, some complementary devices are becoming more essential like your webcam. If your webcam or your microphone stop working for any reason, this will definitely give you a hard time at work, some people even risk to lose their jobs in similar cases.
So in this guide, we will explain to you, dear Windows 7 users, how to check and fix your webcam in case of failure.
Step 1: Check if your camera is disabled or covered
Step 2: Check and fix your webcam driver in Device manager
Step 3: Re-install the driver from your camera or laptop manufacturer's website
Step 5: Check the specific software that can't access your webcam
The webcam issues can differ from one situation to another. It may not be working only in some apps, and maybe it does not work at all. Either way, follow our article and we are sure you will be able to fix whatever the issue is so that you can get back to using your webcam.
Step 1: Check if your camera is disabled or covered
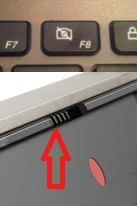
In the era of privacy and security, some laptop keyboards have hotkeys to enable and disable your webcam. Some built-in and external webcams have a slider or lid that can black the image out. Not only that, but totally disconnect the webcam from the laptop or computer as well. So, our first advice is to check your keyboards hotkeys and make sure none of them is disabling the webcam, and check the webcam itself to make sure the lid / slider is open if existing.
Step 2: Check and fix your webcam driver in Device manager
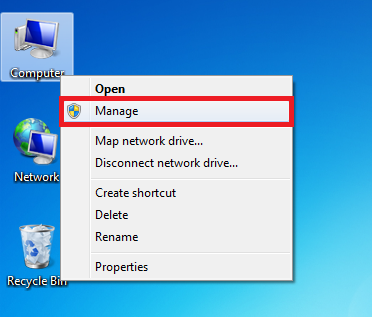
Right-click on your computer icon and then choose Manage.
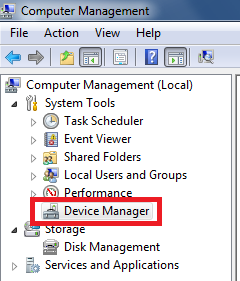
From the left pane, go to this path: Computer Management (Local) > System Tools > Device Manager.
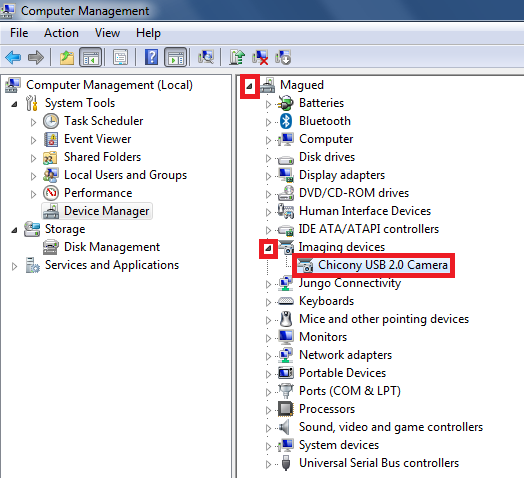
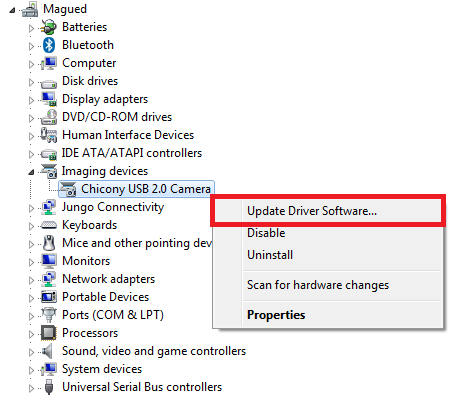
Expand your user > Imaging devices. In this sub-list, you will be able to see all the webcams connected to your computer.
If you can see a downwards arrow on your webcam icon, this means the webcam is disabled. In order to enable it, simply right-click on your webcam and choose Enable.

If your camera is already enabled, right-click on it and then choose Update Driver Software…
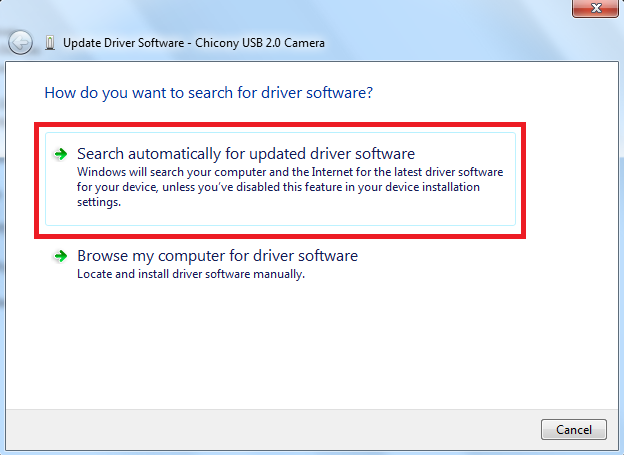
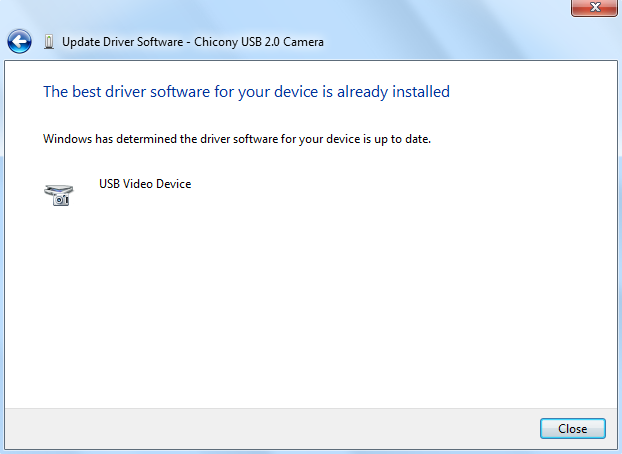
Click Search automatically for updated driver software and wait for the process to be done. If there is a better driver available, your computer will download and install it. Otherwise, it will tell you that the best driver is already installed.
If you've enabled your webcam or updated the driver, try and reboot your computer to see if it works.
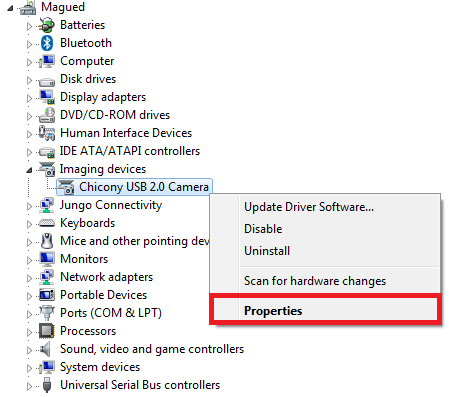
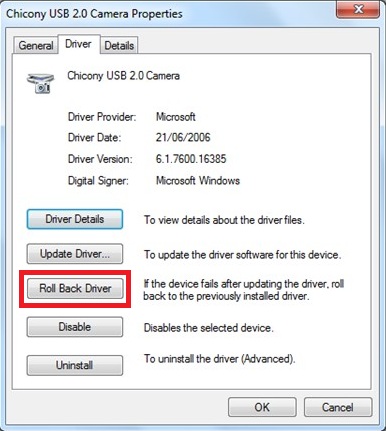
If you're still encountering the same issue, it's time to roll back your driver, this will restore the version before the existing one, only if it has been updated before. Right-click on your webcam and then choose Properties.
In the Driver tab, click the Roll Back Driver button.
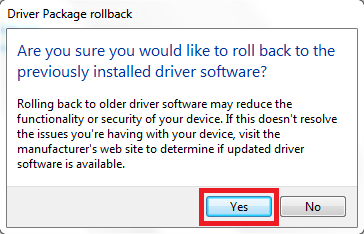
You will be asked for confirmation before rolling back the driver. Click Yes in order to give it the permission.
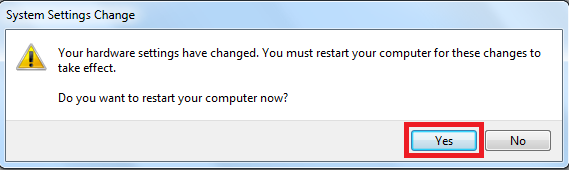
After rolling back your driver, you will be asked to reboot your computer. Make sure to save your open files, and then click Yes.
Step 3: Re-install the driver from your camera or laptop manufacturer's website
Step 4: Check your antivirus
Step 5: Check the specific software that can't access your webcam
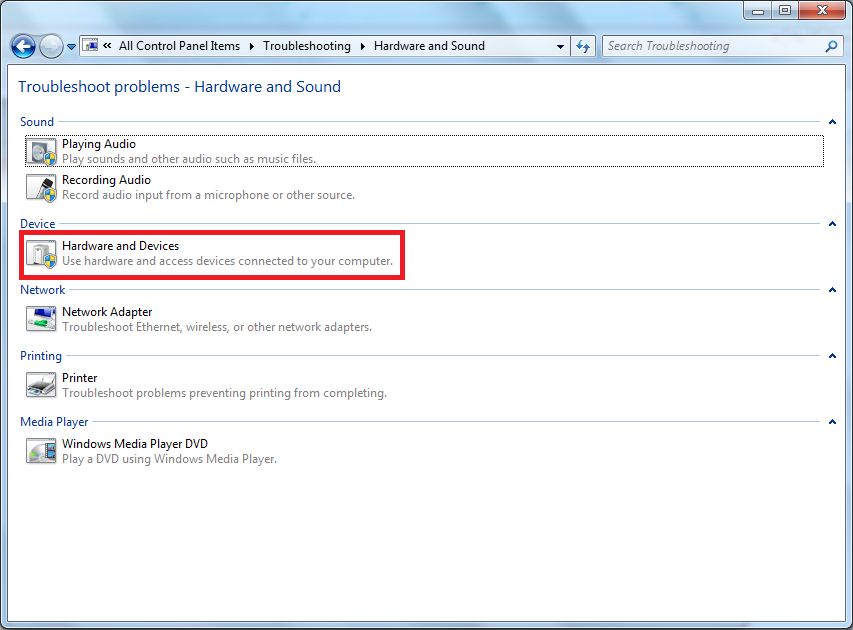
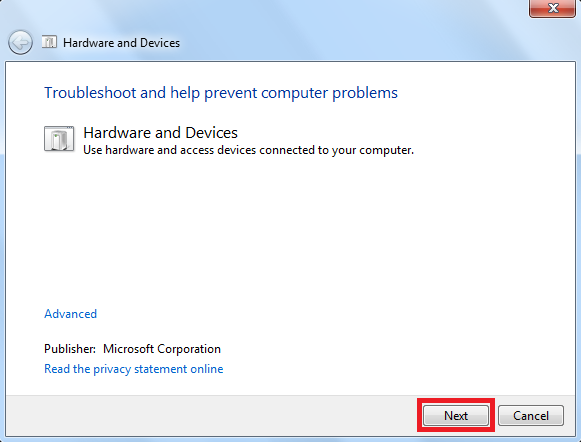
Step 6: Troubleshoot Hardware and Devices
Go to Control Panel\All Control Panel Items\Troubleshooting\Hardware and Sound and then choose Hardware and Devices.
Click Next.
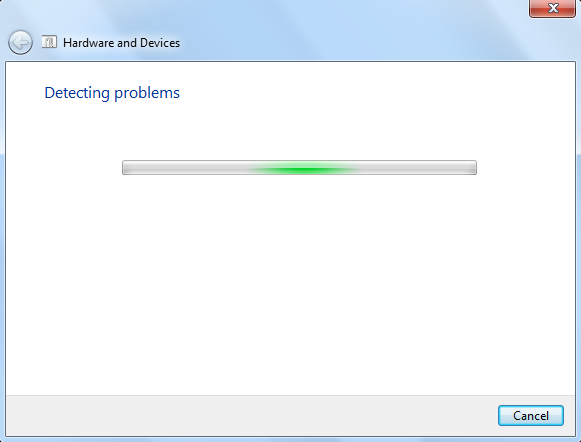
Wait until the computer detects the problem and scan for hardware changes.
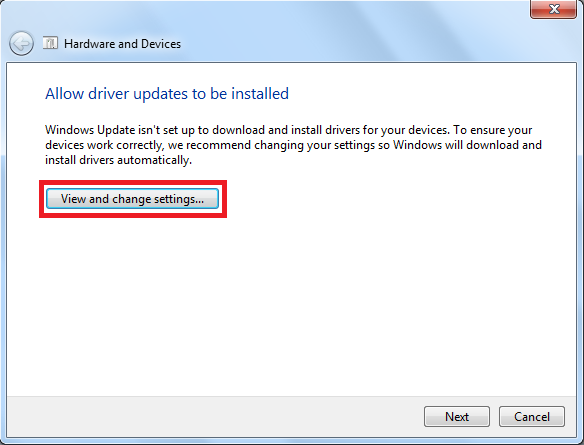
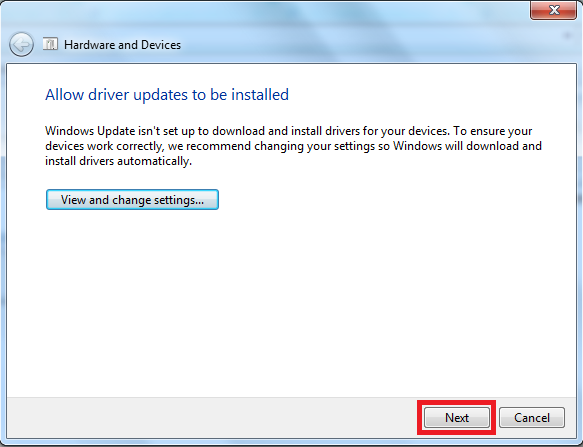
If your automatic updates are turned off, you will have the option to turn them back by clicking View and Change Settings in order to let your computer install drivers automatically.
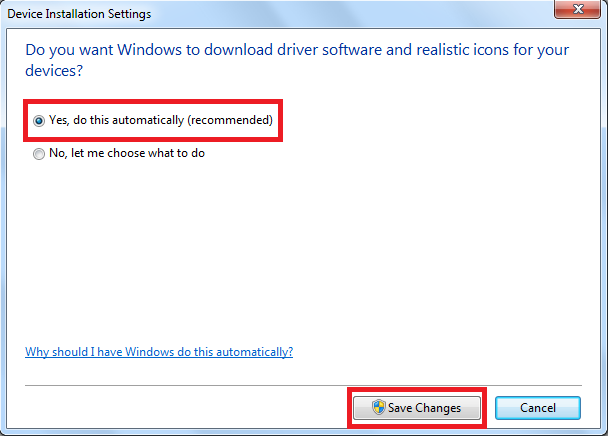
Select Yes, do this automatically (recommended) and then Save Changes.
Now you're back to the last window, click Next.
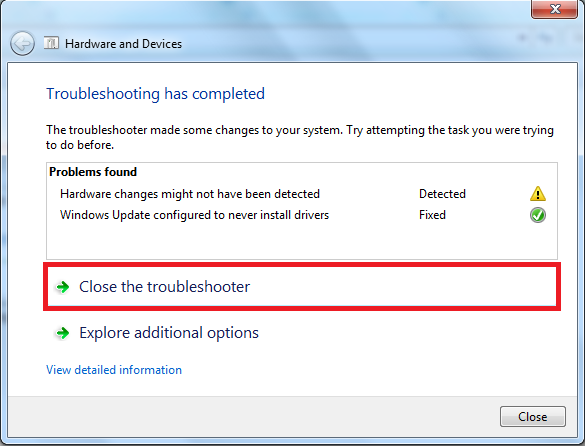
The troubleshoot will scan for problems and fix them automatically. Once done, you will see a list of the problems that were found and fixed. Close the troubleshooter because it won't really be useful after this step. See if your webcam is functioning.
Step 7: Change USB ports or try another computer
- If your computer has multiple USB ports, try plugging the webcam to each of them to identify a faulty port.
- Make sure you try both USB 2.0 and USB 3.0 ports if available, because despite having the same function, the power characteristics is different between the two models.
- Try using another computer with the same operating system, if the issue gets repeated, then even the camera is faulty or not compatible with this version of your operating system.