
Webcams are becoming more and more essential for daily life, especially with the rise of online meetings, remote work, and classes. That is why it can be very critical (and annoying) if your webcam stops working.
There are two types of webcams: a built-in one which comes with almost every laptop nowadays and external USB webcams that you can buy separately and connect to your computer or laptop for more flexibility and higher resolution. The issues are almost the same for both types, but we added a few more tips for external ones at the end of the article, so make sure to check it out if that's the type you have.
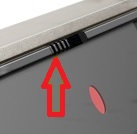
Step 1: Check for a lid or slider covering the camera
Step 2: Check your apps permissions
Step 3: Roll back your webcam driver
Step 4: Re-install the webcam driver
Step 5: Download and install the official driver
Step 6: Check your antivirus software
The webcam issues can differ from one situation to another. It may not be working only in some apps, and maybe it does not work at all. Either way, follow our article and we are sure you will be able to fix whatever the issue is so that you can get back to using your webcam.
Step 1: Check for a lid or slider covering the camera
Some built-in webcams and external ones as well come with lids or sliders. Closing them sometimes does not only black the view out, it can completely disconnect the webcam from the computer. It is a great way to assure privacy and security against hacks, but many users totally forget about it when they have webcam issues.
Step 2: Check your apps permissions
Go to Start > Settings > Privacy > Camera
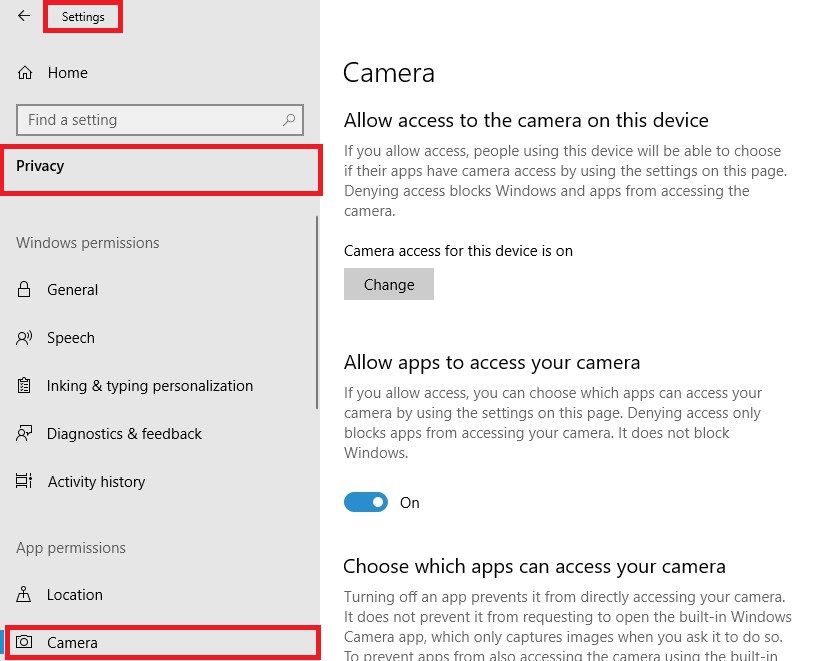
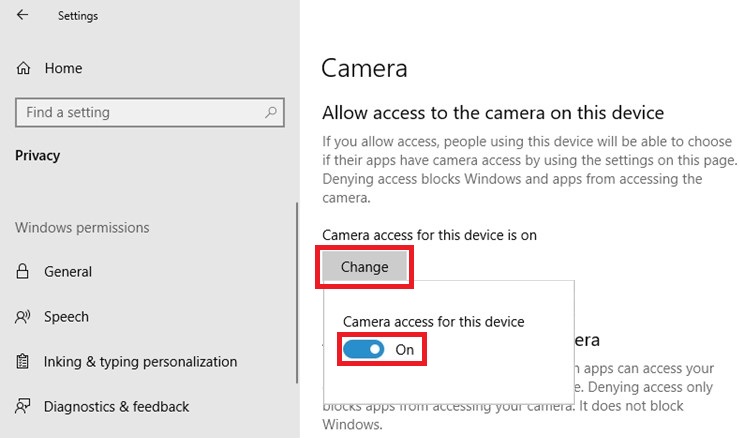
Click the “Change” button in the first section and make sure it’s set to “On”, this is a basic step to activate the camera.
Now in the “Allow apps to access your camera” make sure the toggle button is set to “On” and then you can customize the access for each app in the list.

Step 3: Roll back your webcam driver
If the permissions were already set the right way, then it is probably a driver issue.
First, we will try to roll back the driver, which means going one step back before the last change or update that happened to the webcam, which may have caused the problem. Please note that this option may not be available for you, as you might not have a history of updates for your webcam. If so, do not worry about it and just skip to Step 4.
Here is how to perform a driver roll back:
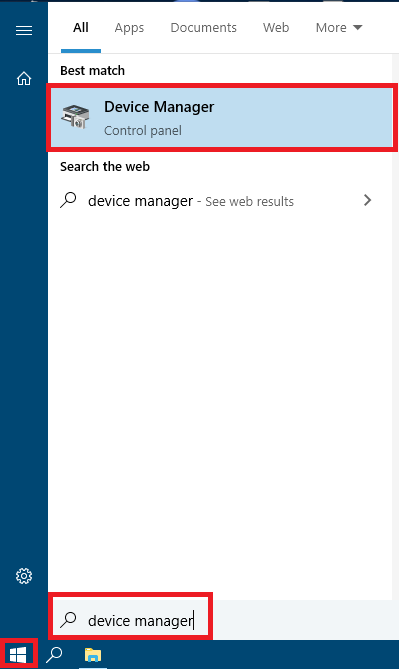
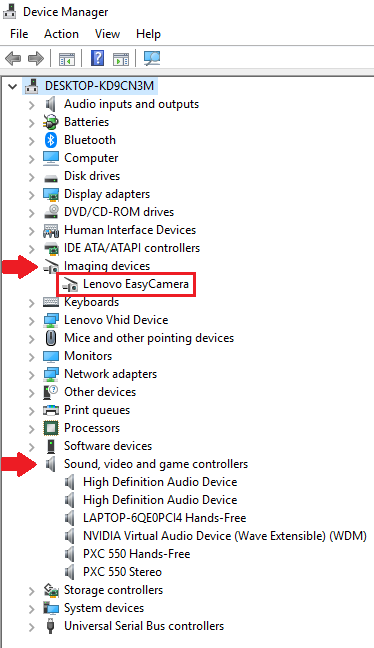
In the start menu, type "device manager" and select it from the search results.
Expand "Imaging devices", "Sound, video and game controllers" or "cameras", and search for your webcam in these sections.
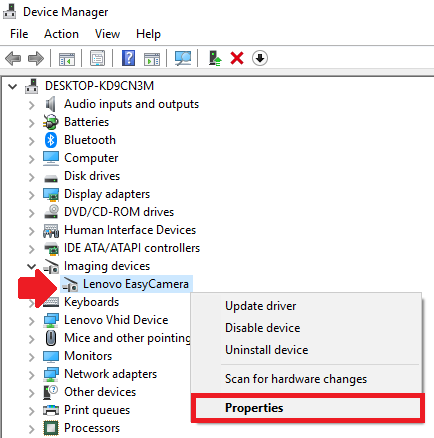
Once you find your webcam, right-click on it and then click "Properties"
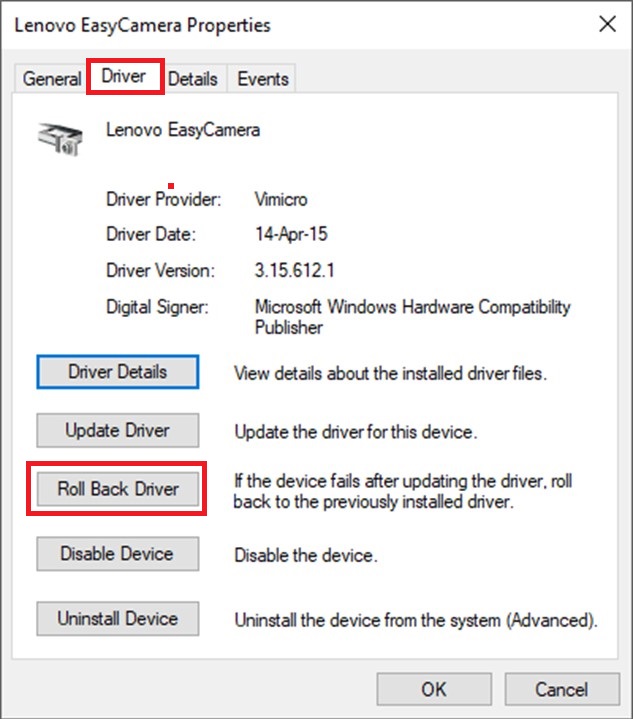
In the "Driver" tab, click the "Roll Back Driver" button.
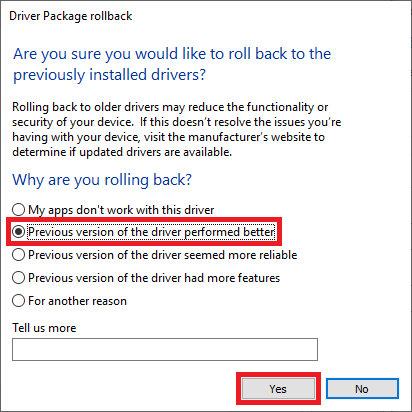
Choose the reason that fits for you, which will probably the second one: “Previous version of the driver performed better” Then click "Yes".
Once the roll back is done, reboot your computer and check if the previous version of the driver you went back to is working.
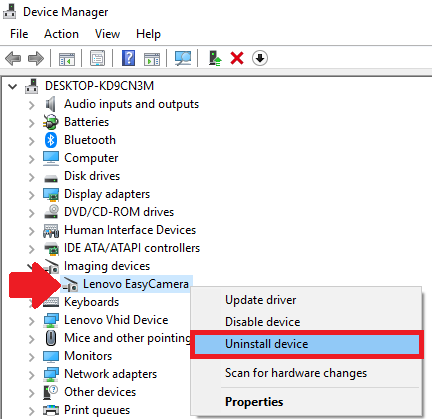
Step 4: Re-install the webcam driver
In the start menu, type "device manager" and select it from the search results.
Expand "Imaging devices", "Sound, video and game controllers" or "cameras", search for your webcam in these sections.
Once you find your webcam, right-click on it and then click “Uninstall device”
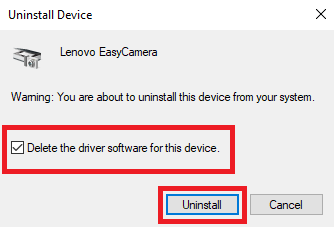
Check the “Delete the driver software for this device” checkbox and then click "Uninstall"
Once your driver is uninstalled, reboot your computer, and see if the webcams returns to life.
Step 5: Download and install the official driver
In the earlier days, laptops, webcams, and other hardware used to come with CDs loaded with the drivers needed for them to function properly. Nowadays, it is totally different. Most devices are now “Plug and Play”, and you do not really need to install any drivers at first for them to work. Yet, some hardware like webcams need to be well-installed for better reliability and stability. Therefore, it is recommended to install their drivers manually.
If it is a built-in laptop webcam, you can always go to the laptop’s manufacturer’s official website and download the webcam driver and then install it manually. Same for the external USB webcam, you are most likely to find a driver for it on the webcam’s manufacturer’s website.
Step 6: Check your antivirus software
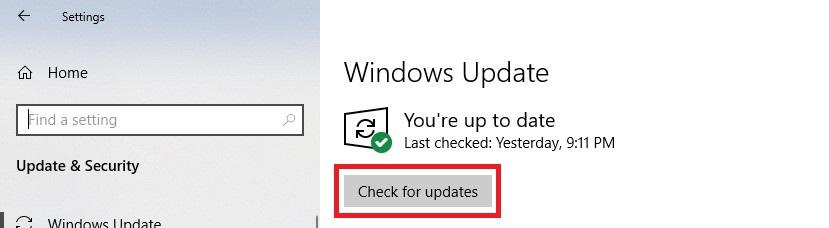
Step 7: How to Update Windows 10
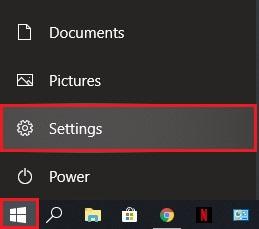
Open Windows' Settings from the start menu.
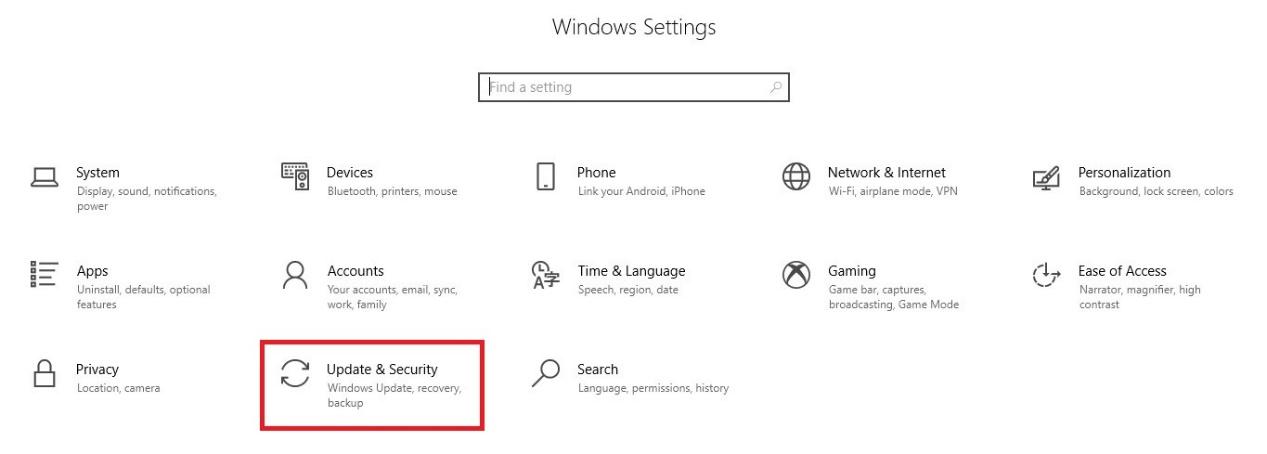
Click the Update & Security icon.
Click the Check for updates button. If there is an update, make sure it is downloaded and installed.
Step 8: Troubleshoot external USB webcams
-Test the same webcam on another computer and try to use another webcam on your own computer in order to determine whether the webcam is faulty or not.
That was it, thank you for reading to the end of the guide, we hope it helped you and that your camera is now working perfectly. Say cheese!