First of all, Microsoft published Windows 8.1 to be an extension to Windows 8, and that includes better features and security. Therefore, it’s highly recommended that you upgrade your Windows 8 to the 8.1 version if you haven’t already. Below is a list of some common scenarios you may be experiencing. Simply find the one which relates to you, and click on it. This will take you to the solution for that case.
1: Check to see if your microphone is correctly configured.
2: You can see green bars moving, but your computer still is not detecting your voice.
3: Your microphone is detected but no green bars appear when you speak.
4: Your microphone isn't listed.
5: Problem with the audio driver: troubleshoot option
6: Problem with the audio driver: manual installation option.
If you can’t decide just follow the guide and at some point your problem should be solved.
1: Check to see if your microphone is correctly configured.
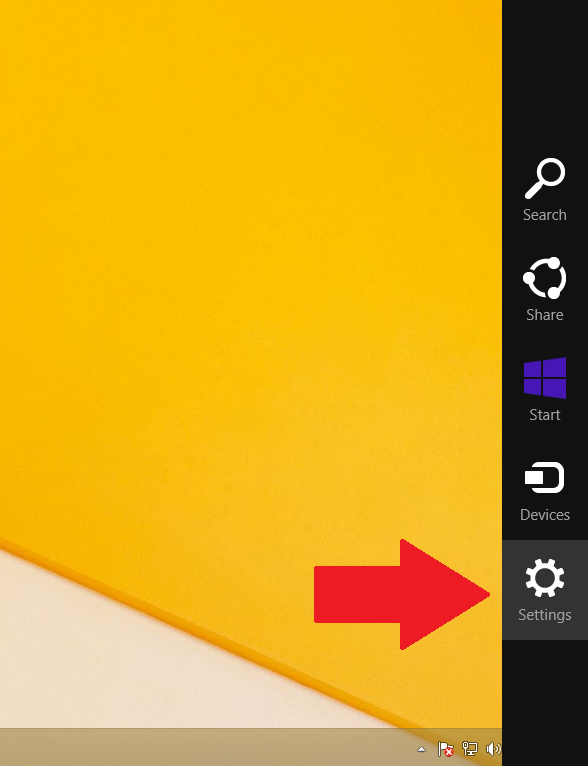
Step 1: Move your mouse cursor to the top-right corner, and move it downwards for the right panel to appear. Then click Settings.
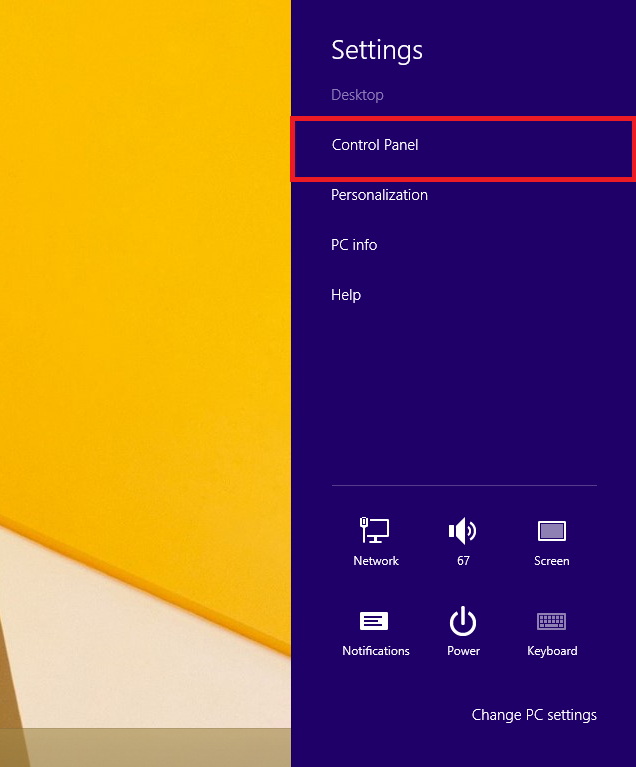
Step 2: Click on Control Panel.
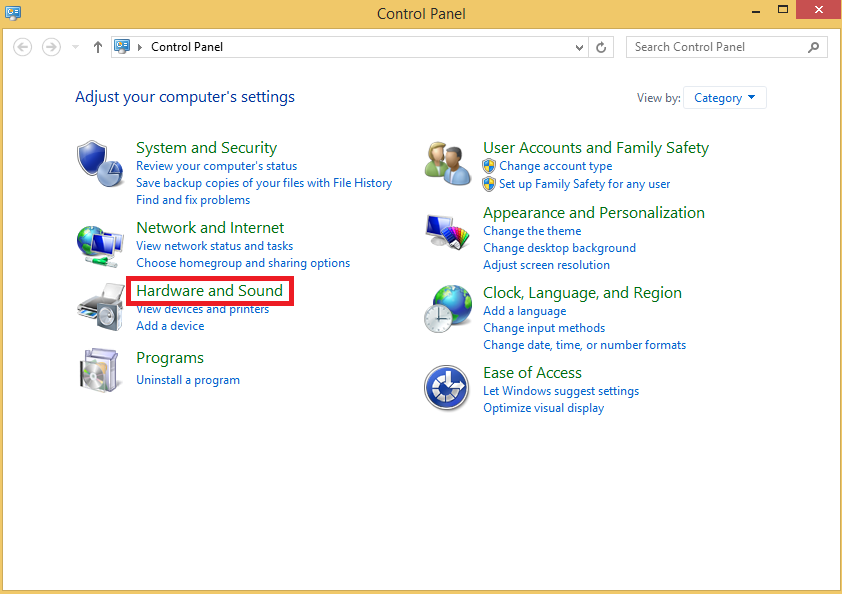
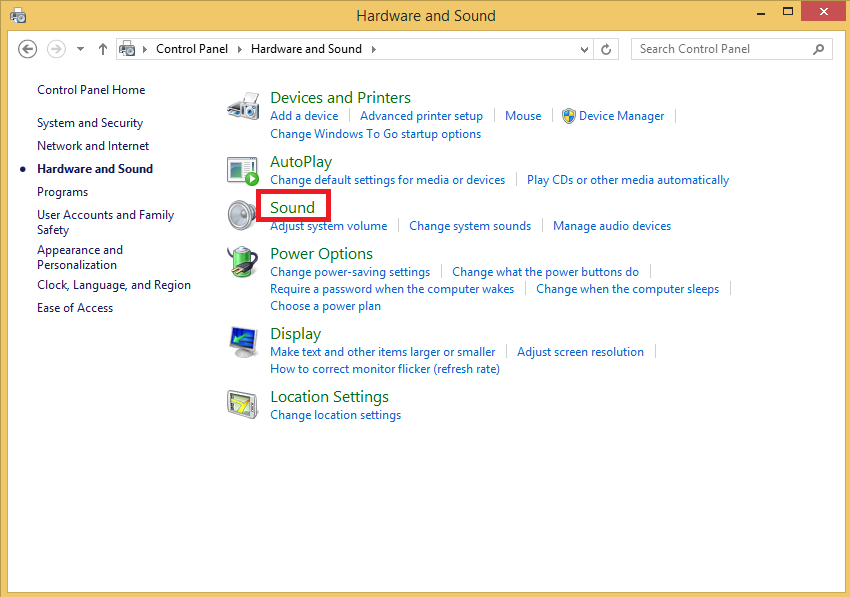
Step 3: Once the Control Panel window pops-up, click on Hardware and Sound.
Step 4: Click Sound in order to launch the sound control center.
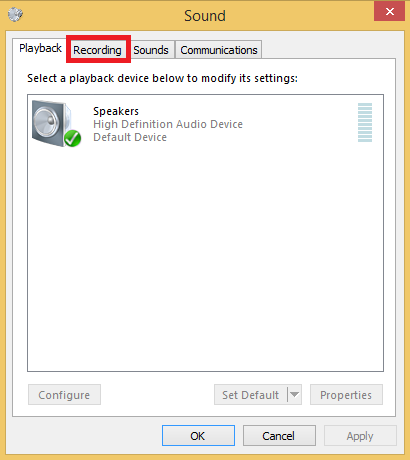
Step 5: Now click on the Recording Devices tab in order to see a list of your microphones.
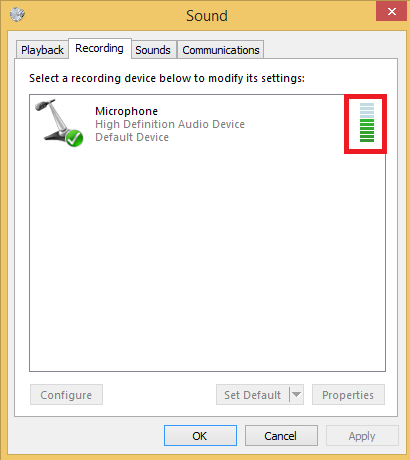
Step 6: Now you will see a list of your recording devices. Try speaking into your microphone and look for green bars rising while you are speaking.
2: You can see green bars moving, but your computer still is not detecting your voice.
If your microphone does show green bars but you still can't capture your voice, that may mean that your microphone is working correctly but your computer can’t recognize it as your default recording device.
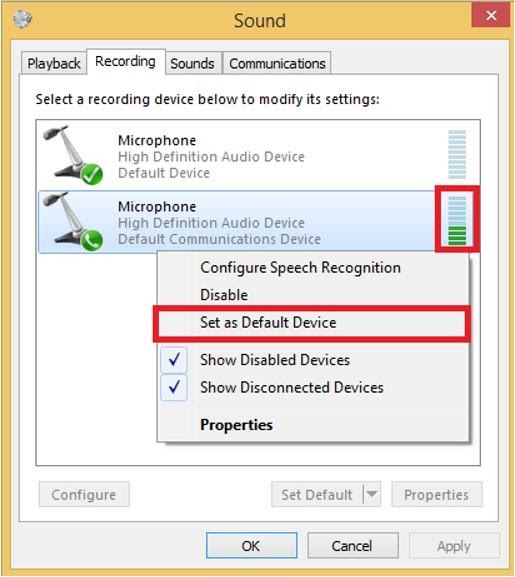
Therefore, you should do it yourself by right-clicking on it and then click Set as Default Device, and your computer will consider it your go-to microphone whenever it needs to record audio from now on.
If the green bars are rising when you speak into your microphone but the computer is still not picking up your voice, it may mean your microphone is working but is not set as your default recording device.
To set it as your default device, simply right-click on your device and select set as Default Device. Your computer will now recognize it as your go-to microphone whenever it needs to record audio.
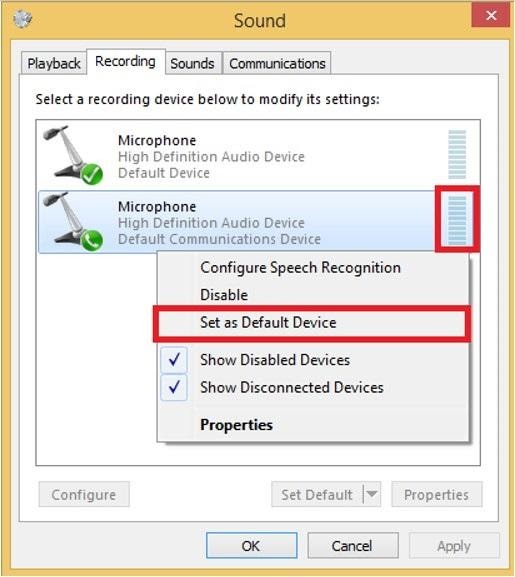
3: Your microphone is detected but no green bars appear when you speak.
Step 1: Right-click on your microphone and choose Set as Default Device. Note that if you have only one recording device in the list, it will be set as the default recording device by default and you won’t be able to see the option, so you should then skip to the next step.
Step 2: Double-click on the device and in the window that pops up click on the Levels tab.
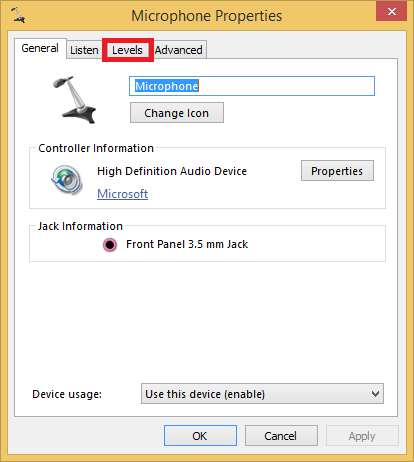
Step 3: Drag the "Microphone" slider all the way to the right, until the level is set to ‘100’. Drag the Microphone Boost slider in order to make it above average, maybe all the way to the maximum if needed.

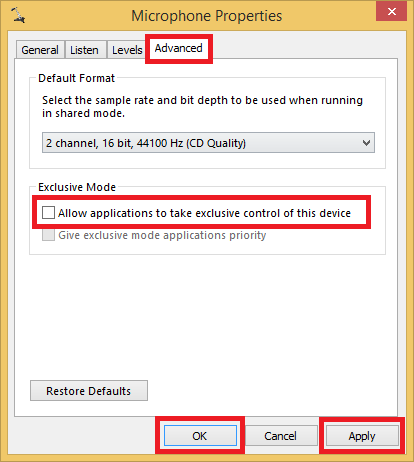
Step 4: Now click on the Advanced tab and uncheck the option Allow applications to take exclusive control of this device. This will guarantee that no application is taking control over your microphone and muting it on purpose. Afterwards, click Apply then Ok.
Step 5: Now check again to see if there are green bars rising when you talk into the microphone. if there are, your mic is now properly configured.
If your microphone isn't working in a specific program, then you know that Windows is configured correctly and can "hear" your microphone, but the program you're using can not. (to verify this, check your microphone with our mic test tool - and you'll be able to see that the browser is detecting the input from the microphone).
Also, the program you're working with might be listening to the wrong microphone. Try to explore its audio settings and change its default recording device. If you are still stuck, you should contact its support team to guide you through the configuration.
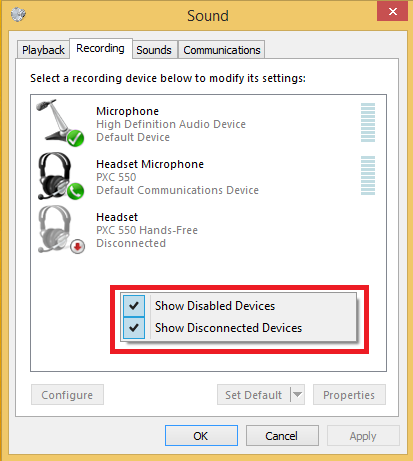
4: Your microphone isn't listed.
Step 1: Let's start with listing all your recording devices, even the disabled ones, by right-clicking in an empty area in the recording devices list and enabling both Show Disabled Devices and "Show Disconnected devices.
5: Problem with the audio driver: troubleshoot option
Another possibility is that you have a problem with your audio driver. We can begin by troubleshooting the audio settings and if this doesn't work, we can then reinstall the driver. (see next case)
How to use the troubleshooter in order to solve the problem:
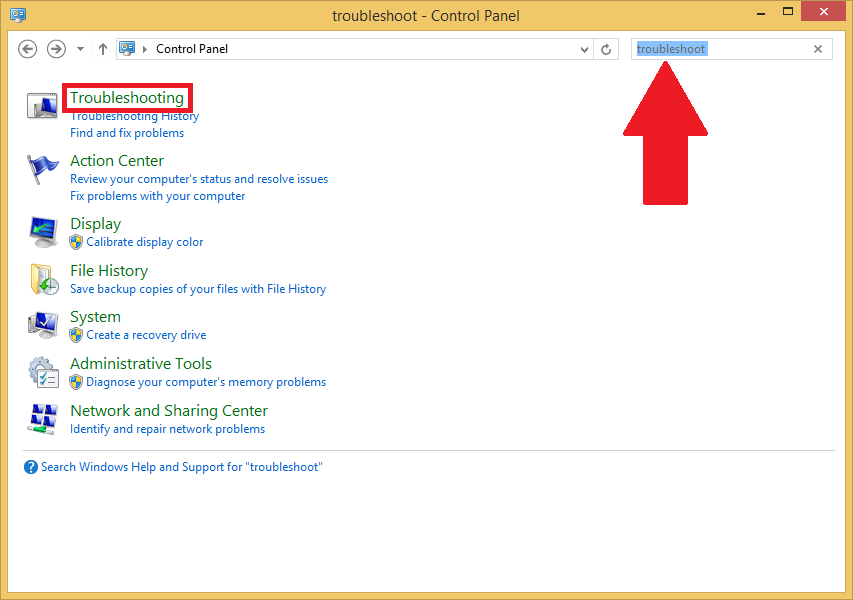
Step 1: Open Control Panel from the right pane as we mentioned before.
Step 2: Type troubleshoot in the search part and then click on Troubleshooting.
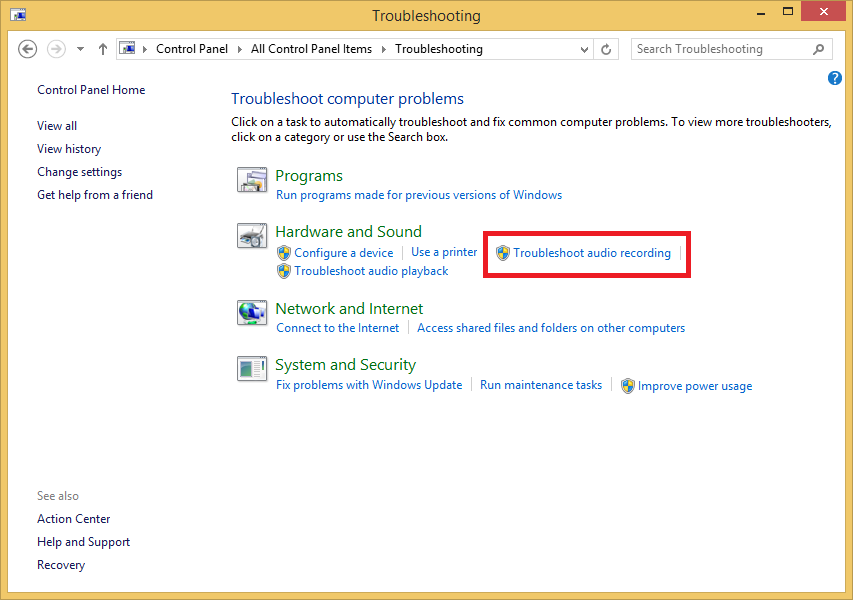
Step 3: Now click on Troubleshoot audio recording.
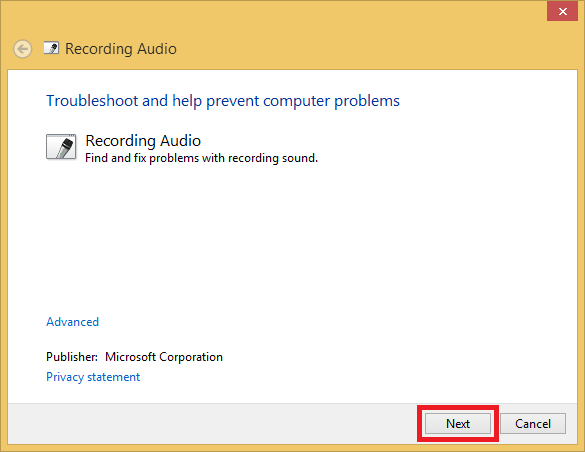
Step 4: In the windows that will pop up, click Next in order to start the troubleshooting procedure.
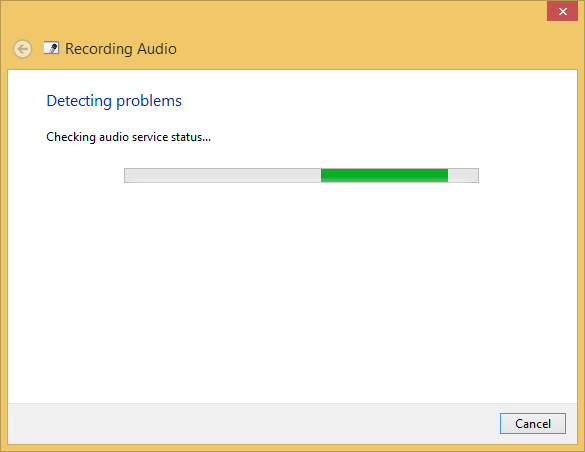
Step 5: Give it some time, it's relative to the number of recording devices you have.
Step 6: Now select the device you're having trouble with and then click Next. The screenshot is just representing my case, you need to choose your own device with the problem.

6: Problem with the audio driver: manual installation option.
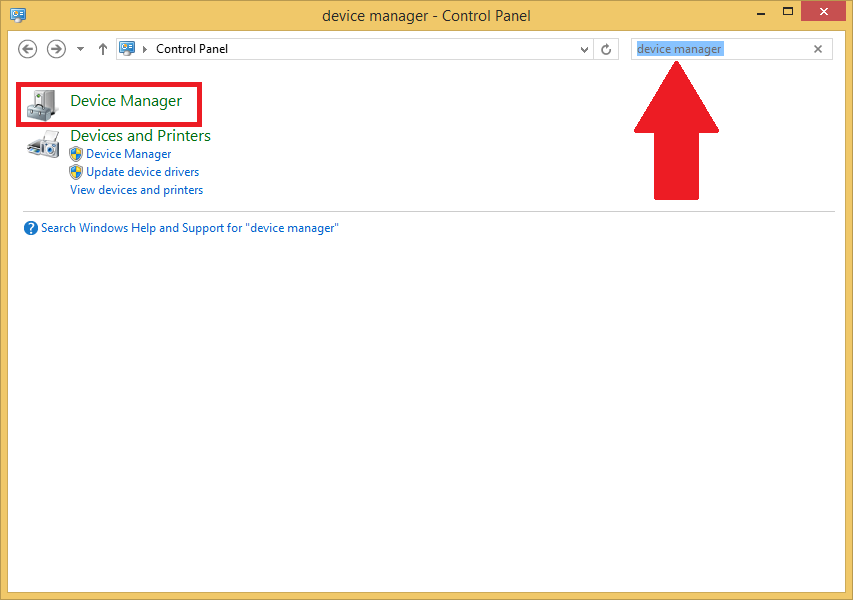
step 1: Open Control Panel from the right pane as usual.
Step 2: Search for and then click on Device Manager.
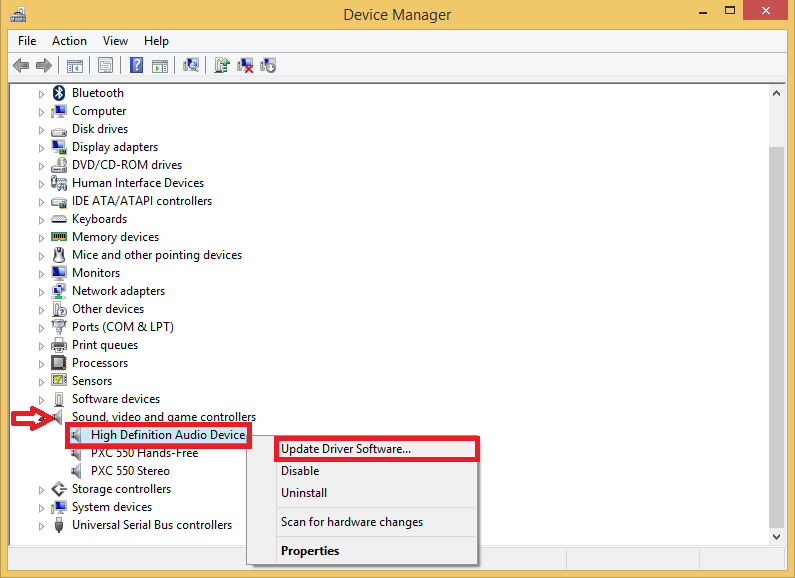
Step 3: Once the Device Manager pops up, expand Sound, video and game controllers. Right-click on High Definition Audio device and then click Update Driver Software….
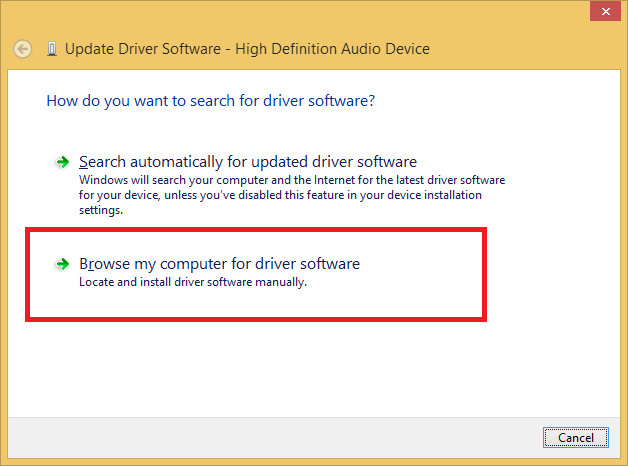
Step 4: Now choose to Browse my computer for driver software.
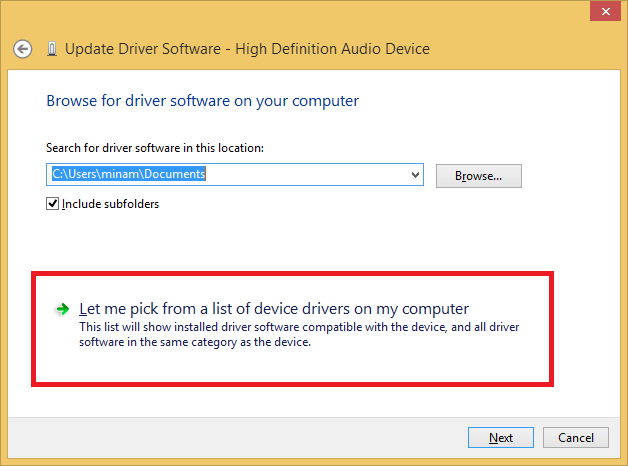
Step 5: Down below, you will find an option: Let me pick from a list of device drivers on my computer.
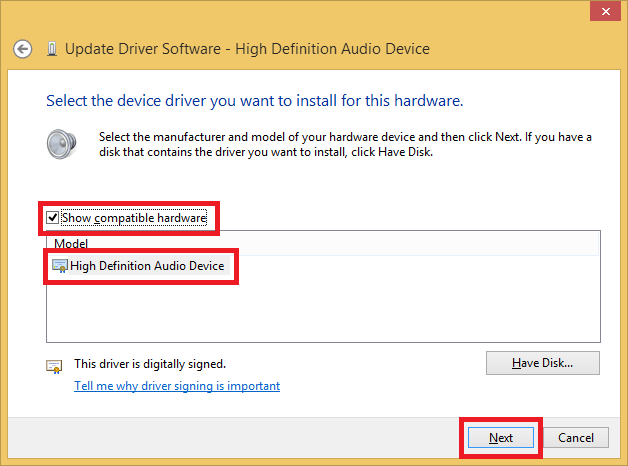
Step 6: Make sure to check Show compatible hardware, then select High Definition Audio Device and finally click Next.
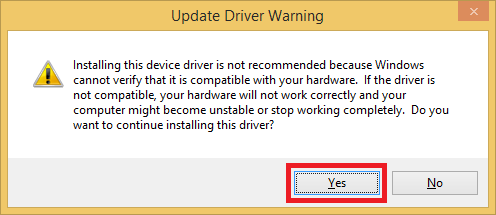
Step 7: If you get this warning, just click Yes. You have nothing to worry about, really, since your microphone hasn’t been working anyway!
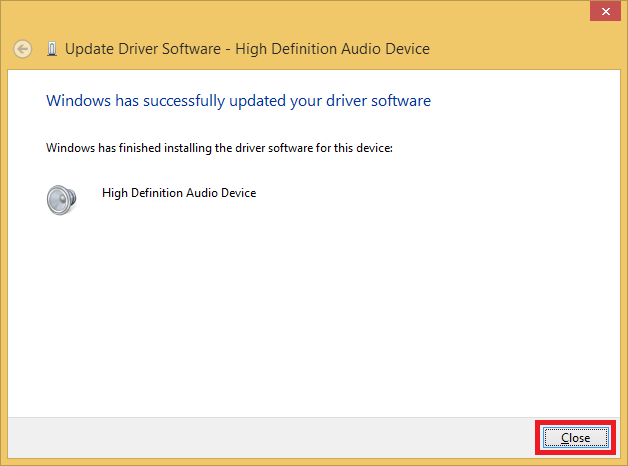
Step 8: That's it, the driver is successfully installed. You can now click Close.
It's highly recommended that you restart your computer after any driver changes because some changes will not take place until you do.
Some final tips:
Make sure to use the right microphone/headset that's compatible with your device:
If you think the problem is with your sound card, or if you tried all the steps and nothing worked, you can always buy an external sound card. This can be connected to your computer via USB and you can then plug your microphone to it.