Here are some scenarios. Please click on the one similar to your case and you will be sent to the appropriate location in the guide.
1: You just want check if your microphone is correctly configured in Windows 7.
4: Your microphone isn’t listed in the settings: Option 1
If you can’t decide, just follow the guide and at some point, your problem will be solved.
1: You just want check if your microphone is correctly configured in Windows 7.
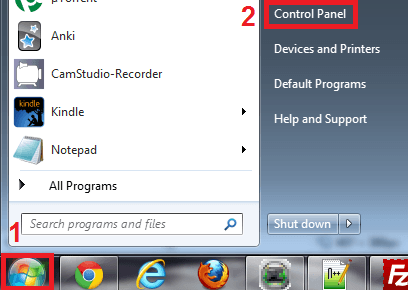
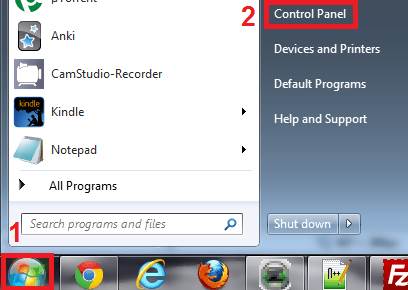
Step 1: Click on the Windows logo button in the bottom-left corner of the screen in order to open the start menu, and then click on "Control Panel".
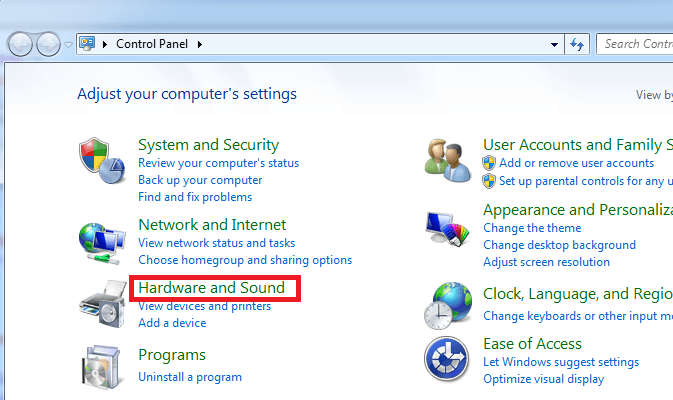
Step 2: Click on “Hardware and Sound”.
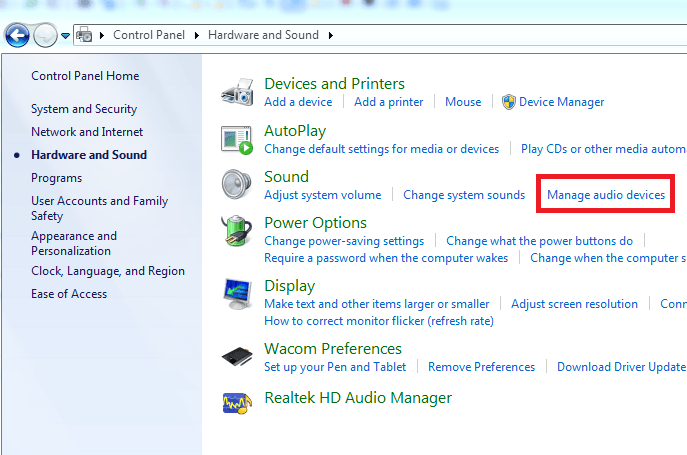
Step 3: Under the “Sound” section, click on “Manage audio devices”.
Step 4: Click on the “Recording” tab in order to view your recording devices list.

Step 5: Now you will see a list of your recording devices. Try speaking into your microphone and look for green bars rising while you talk.

2: You see green bars rising in the microphone settings window, yet your computer doesn’t seem to detect your voice.
If your microphone does show green bars but you still can't capture your voice, make sure it's already your default device or do it yourself by right-clicking on it and then click "set as Default Device".

3: Your microphone is in the list in the settings, but there are no green bars rising when you speak.
Step 1: Click on the relevant device to highlight it, and then click on “Set Default”

Step 2: Double-click on the device and in the window that opens up click on the “Levels” tab.

Step 3: Drag the "Microphone" slider all the way to the right, until the number ‘100’ is displayed beside it. Drag the "Microphone Boost" slider in order to make it above average.

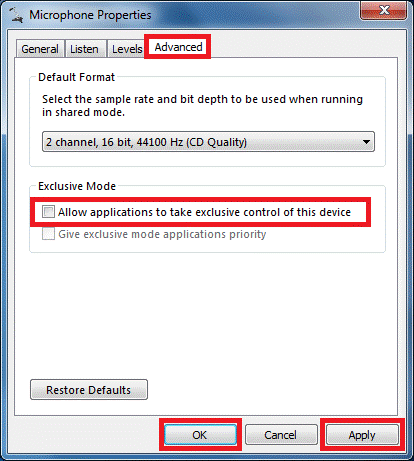
Step 4: Now click on the "Advanced" tab and uncheck the option "Allow applications to take exclusive control of this device". This will guarantee that no application is taking control over your microphone and muting it on purpose. Afterwards, click "Apply" then "Ok".
4: Your microphone isn’t listed in the settings: Option 1
Let's start with listing all your recording devices, even the disabled ones, by right-clicking in an empty area in the recording devices list and enabling both "Show Disabled Devices" and "Show Disconnected devices".

If a new microphone shows up, give it a try by setting it as default and increasing its level and boost as explained before.
5: Your microphone isn’t listed in the settings: Option 2
Step 1: Open Control Panel from the start menu.
Step 2: Type troubleshoot in the search part and then click on "Troubleshooting"

Step 3: Now click on "Troubleshoot audio recording".

Step 4: In the windows that will pop up, click "Next" in order to start the troubleshooting procedure.

Step 5: Give it some time, it's relative to the number of recording devices you have.

Step 6: Now select the device you're having trouble with and then click "Next". The screenshot is just representing my case, you need to choose your own device with the problem.

6: Your microphone isn’t listed in the settings: Option 3
Step 1: Open Control Panel from the start menu.

Step 2: Search for device manager and then click on "Device Manager"
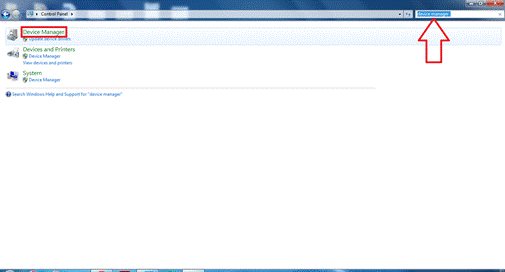
Step 3: Once Device Manager pops up, expand "Sound, video and game controllers", right-click on "High Definition Audio device" and click "Update Driver Software …"

Step 4: Now choose to "Browse my computer for driver software".

Step 5: Down below, you will find the option: "Let me pick from a list of device drivers on my computer".

Step 6: Make sure to check "Show compatible hardware", then select "High Definition Audio Device" and finally click "Next".

Step 7: If you get this warning, just click "Yes". You have nothing to worry about, really, since your microphone hasn’t been working anyway!

Step 8: That's it, the driver is successfully installed. You can now click "Close".

It's highly recommended that you restart your computer after any driver changes: some changes will not take place until you do
Some final tips:
Make sure to use the right microphone/headset that’s compatible with your device:
Make sure you didn’t mute your microphone by mistake, some microphones have physical volume sliders or mute button.
If you think the problem is with your sound card, or if you tried all the steps and nothing worked, you can always buy an external sound card which can be connected to your computer via USB and you can then plug your microphone to it.

