
How to Add Audio to Google Slides
Google Slides is known as one of Microsoft PowerPoint's best alternatives due to its accessibility, and top-notch features which make it a fantastic free option. In addition to the basic features that can be found in PowerPoint, there are a few “power points” that are in the favor of Google Slides:
1- It is totally free, no need for any paid subscriptions or plans.
2- No need to install a software on your computer, only an internet browser is required installed on a computer with basic specs and you are ready to go.
3- Based on the previous advantage, Google Slides is cross-platform because it is web based, so you will have the same experience working on it using any operating system (Windows, MacOS, Linux …etc.). You can also keep working on your presentation from anywhere across your devices without losing any progress.
After all, you are here to know how to add audio to Google Slides, it is very simple and straight forward. Just follow the next steps and we will walk you through it. We will also suggest the best audio settings in some situations as well as important notes.
Step 1: Convert your audio file to a supported format
Step 2: Upload your audio file to your Google Drive
Step 3: How to insert audio into Google Slides
Step 4: Set some format options
Step 6: Best settings for specific situations
Before going through the steps, here are a few general things to consider when it comes to working with audio in Google Slides:
1- Only .mp3 and .wav audio formats are supported. If your audio is in a different format, go to this section for a workaround.
2- The audio you are wanting to insert has to be uploaded on your Google Drive or shared with you via Google Drive. You cannot upload an audio file directly from your computer to Google Slides.
3- Since you cannot directly upload audio to your Google Slides, drag and drop does not work with audio (it works fine with images but not audio files).
Step 1: Convert your audio file to a supported format
As we mentioned before, Google Slides only supports .mp3 and .wav formats. But in fact, there are a variety of audio formats out there like .wma, .3gp, .amr, .ogg and one of the most important formats is .m4a, which is now the default recording format on most smartphones. So, if you are recording your audio clip using your phone like the majority of people, you won’t be able to insert it directly into your Google Slides presentation.
Luckily, there is a way to overcome this problem by using audio converters. There are large numbers of software and web-based converters out there that you can use in order to convert your audio from any format to .mp3 and .wav. Our recommendation is to always go to mp3 since you will probably be more familiar with it and with its different qualities.
In this guide, we will introduce a web-based audio converter that requires no software installations on your computer nor fees and it will do the job just fine.
*Note that cloud and web-based tools are not recommended if you are using confidential data. So if you are extra precautious about your privacy or your company regulations, for example, it will be better to use a paid software-based converter that will guarantee your total privacy and isolation from any third-party cloud.
So here it is, you can simply go to Online Audio Converter which has a very simple interface with just a couple of clicks needed in order for you to receive the .mp3 version of your audio clip:
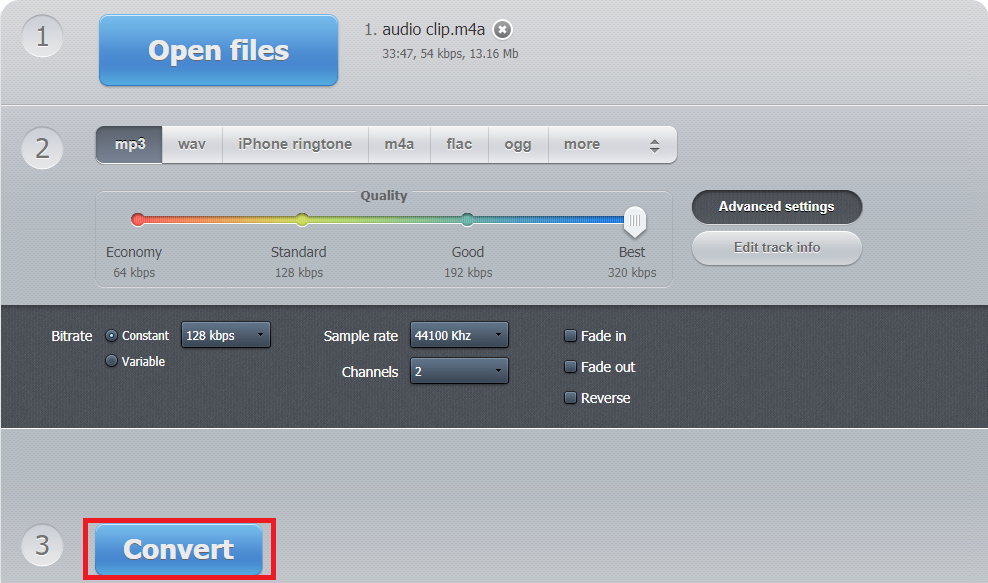
Click the Open files button in order to find your audio clip on your local computer and click Open to upload it. Note that there are also options to import your audio from Google Drive, Dropbox or a specific URL.
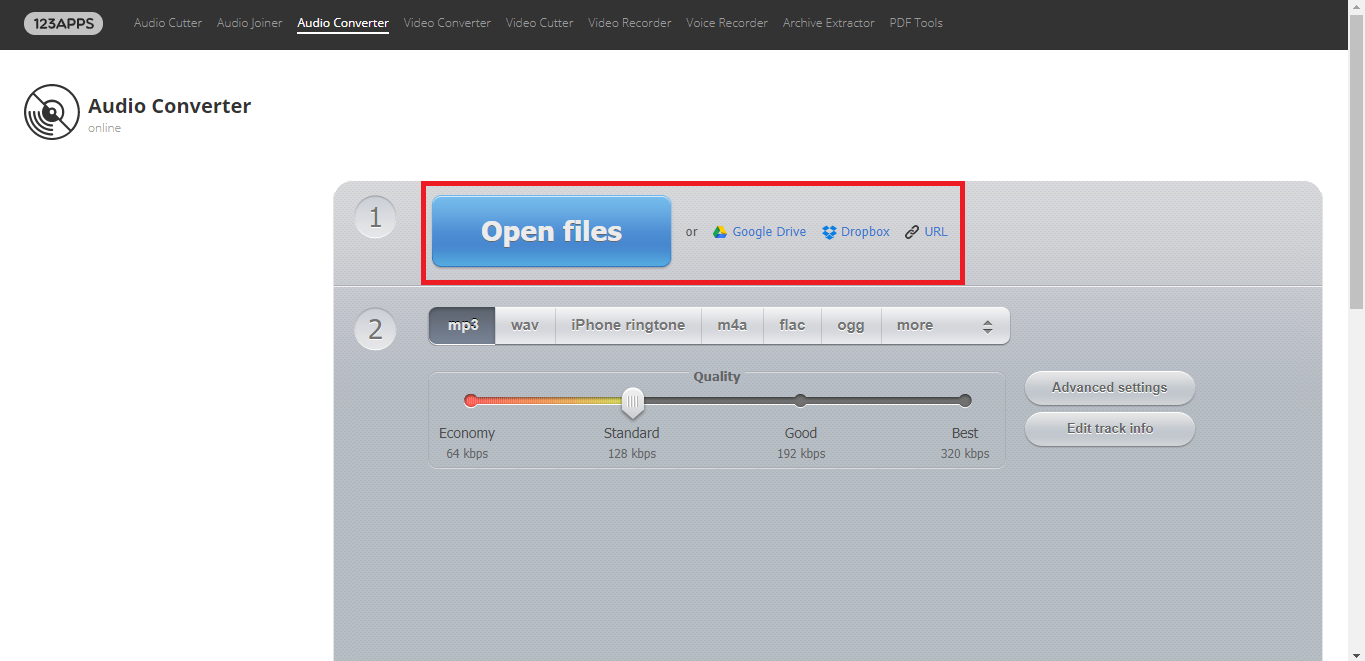
Select mp3 which will be already selected by default but just make sure. Adjust the quality of the audio file you need. If you are not limited by a file size, it is recommended to set it to the best quality which gives you 320 kbps.
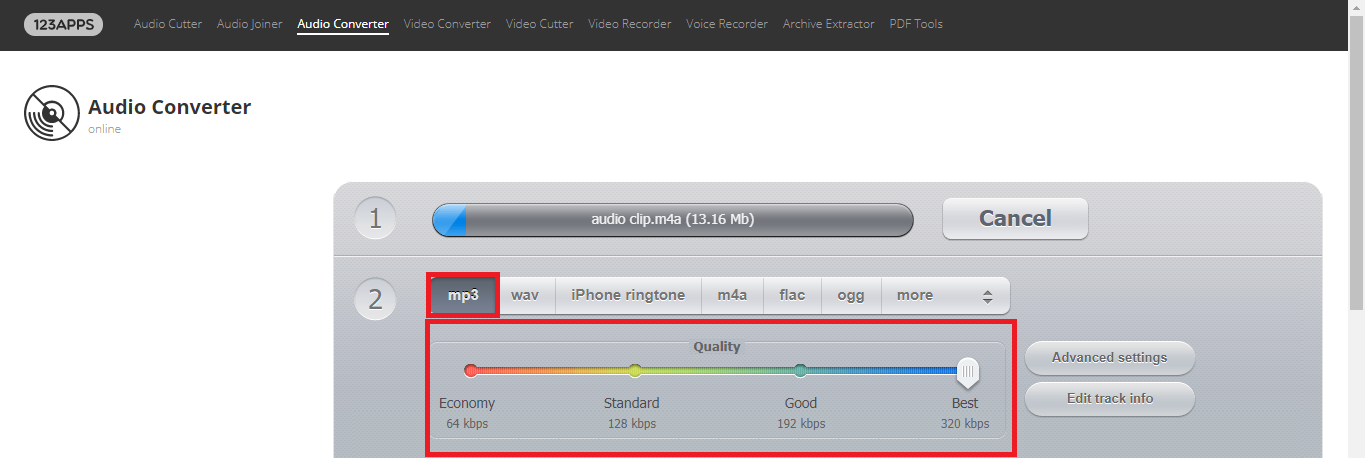
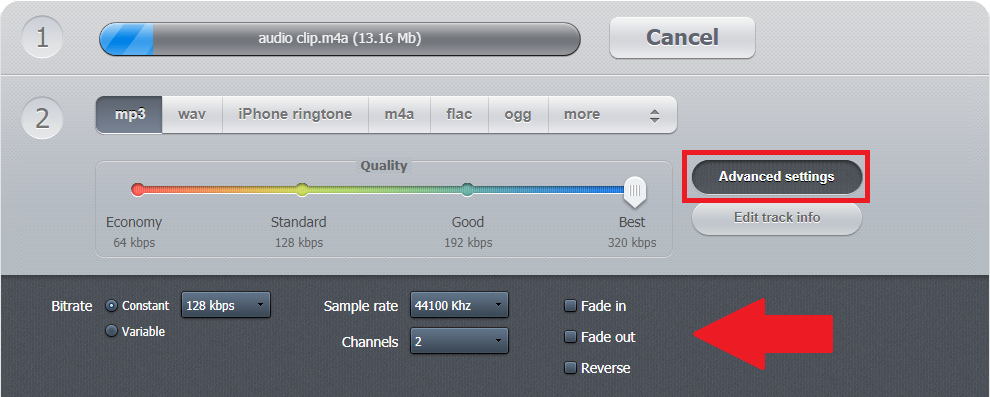
If you want to add effects to your audio, like a fade in and fade-out, you can click the Advanced settings button and try those additional features there.
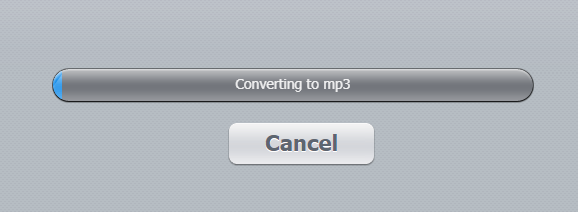
Once everything is adjusted and the audio clip is completely uploaded, click the Convert button.
Now, wait for your progress bar to reach its end.
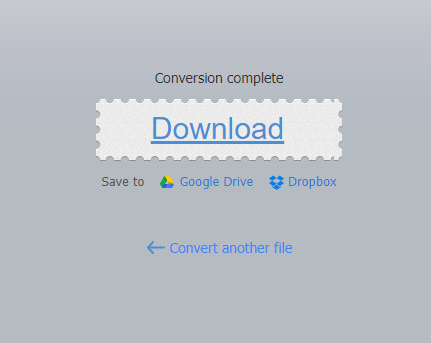
Finally, you will be able to download your .mp3 audio clip on your local computer, as well as save it to your Google Drive directly. This will be convenient since Google Slides imports the audio clip from your Google Drive and not directly from your local computer as we explained before.
Step 2: Upload your audio file to your Google Drive
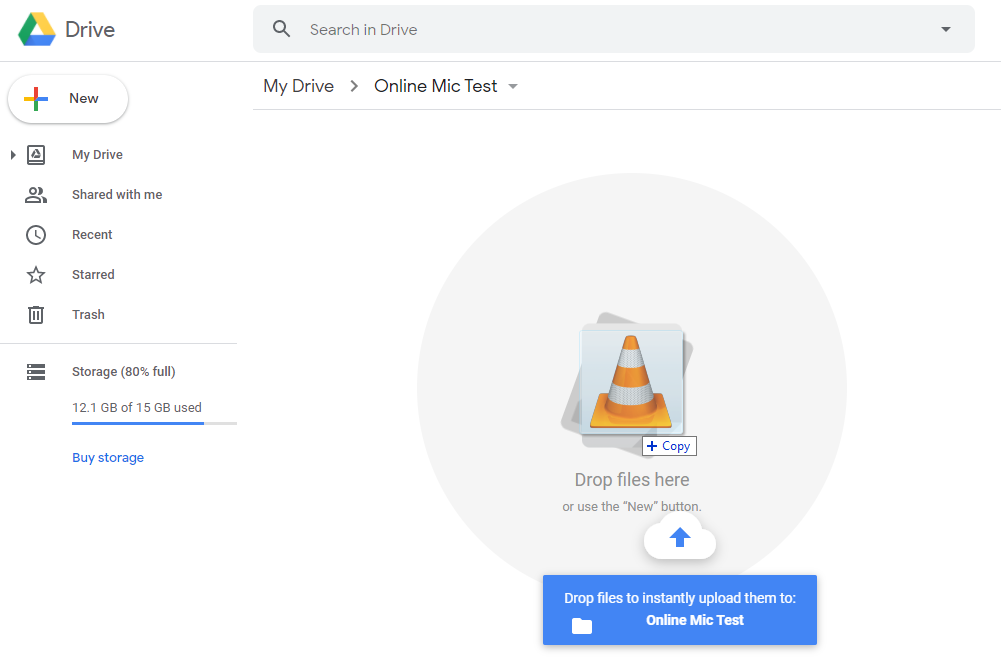
Go to Google Drive and sign in with your Google account if you have not already.

Drag and drop the audio file into your drive.
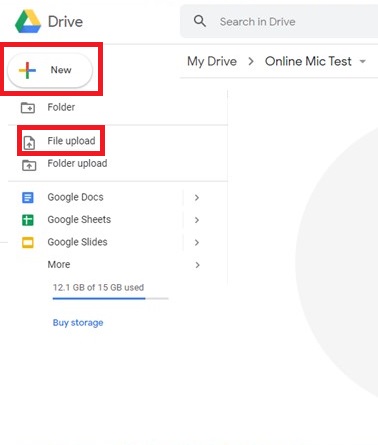
Another way to upload your audio clip is to click New > File upload > Browser to your file, select it and then click Open.
Now your audio should be available on your Google Drive, and it is time to insert it into your Google Slides.
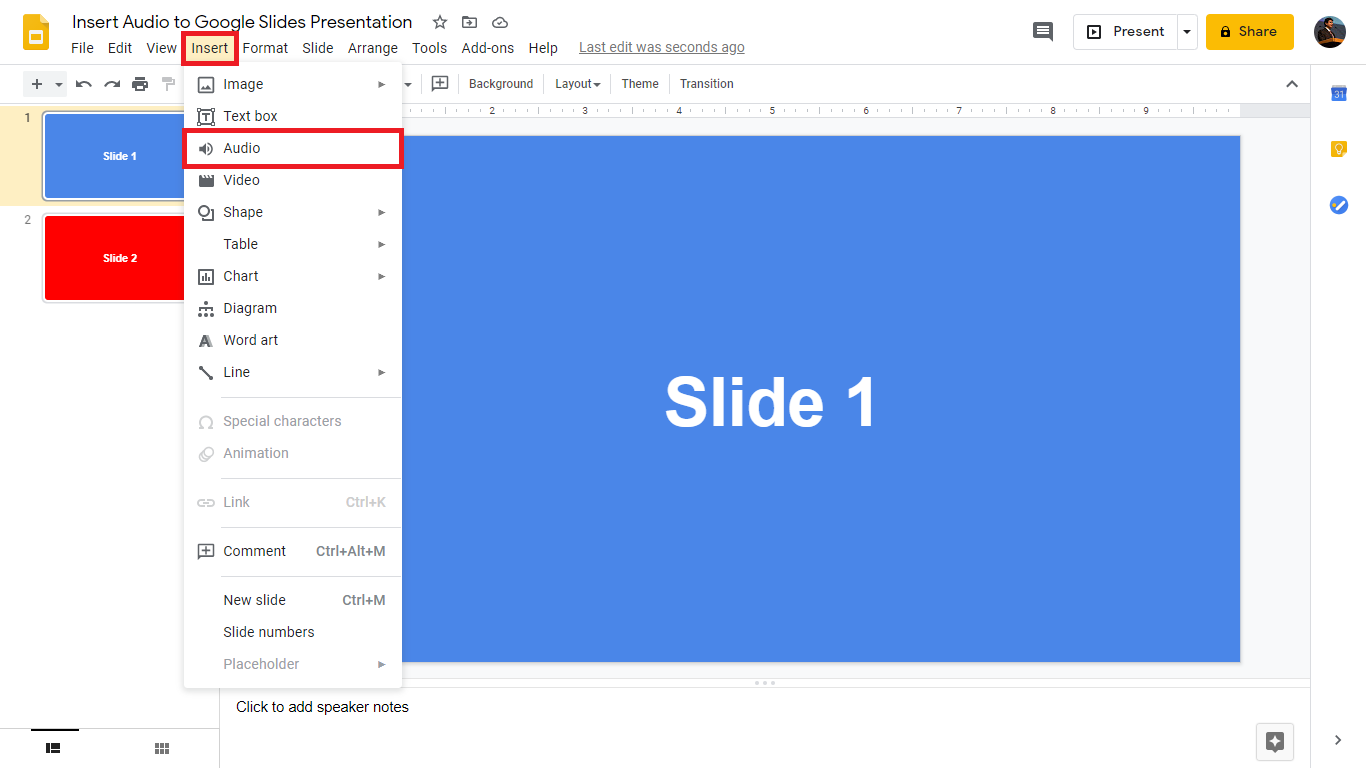
Step 3: How to insert audio into Google Slides
In your Google Slides presentation, go to the slide you are wanting to insert the audio into. On the menu bar, click Insert and then choose Audio.
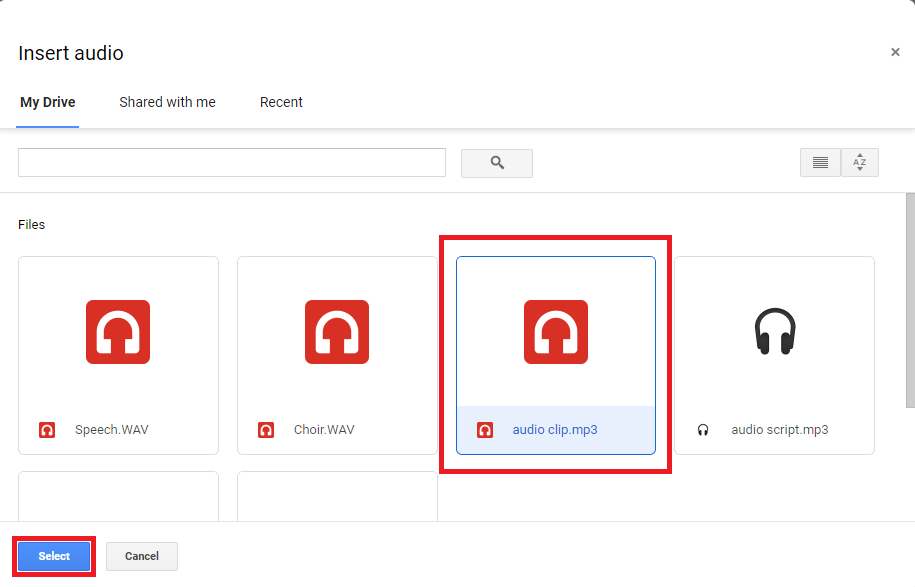
In the My Drive tab, search for your audio file, select it, and then click the Select button.
You should now see the speaker icon added to your slide and when selected, you will see the play button, progress bar, volume controller, and the format options in the right pane, which we are going to focus on in the next section.

The “Hide icon when presenting” will hide the speaker icon representing the audio clip in presentation mode. If the Start Playing was set “On click”, then this option will be grayed out by default because logically, you will not be able to “click” on the icon if it is “hidden”.
The “Loop audio” checkbox will help you turn on/off the repetition of the audio clip after it ends for an infinite number of times.
“Stop on slide change” is explaining itself, once checked, the audio in a certain slide will stop once you switch to the next slide.
Step 4: Set some format options
If you cannot see the format options right pane, select the speaker icon, and then click the Format options button.
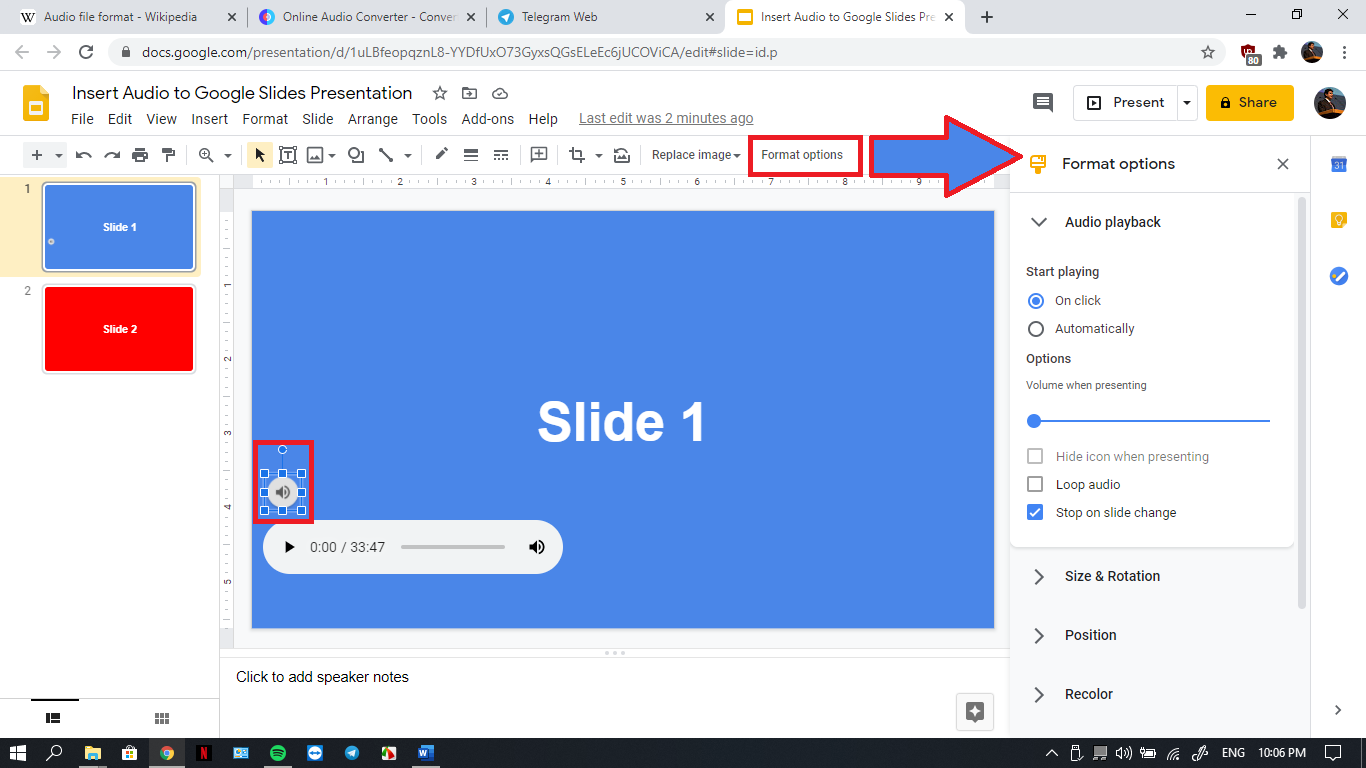
Expand Audio playback and select the following settings:
Start Playing can be set to “On click”, to manual by clicking the speaker icon during the presentation, or “Automatically” so that the audio starts with the slide.

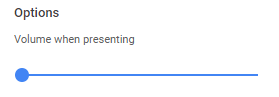
Remember the volume controller in the Step 3? That was the volume of the audio clip during edit mode. But during the presentation, the actual volume that the audience will hear is set by going to Options > Volume when presenting.
The “Hide icon when presenting” will hide the speaker icon representing the audio clip in presentation mode. If the Start Playing was set to “On click”, then this option will be grayed out by default because you will not be able to “click” on the icon if it is “hidden”.
The “Loop audio” checkbox will help you turn on/off the repetition of the audio clip.
“Stop on slide change”, when checked, will cause the audio in a certain slide to stop once you switch to the next slide.
Step 5: Some important notes
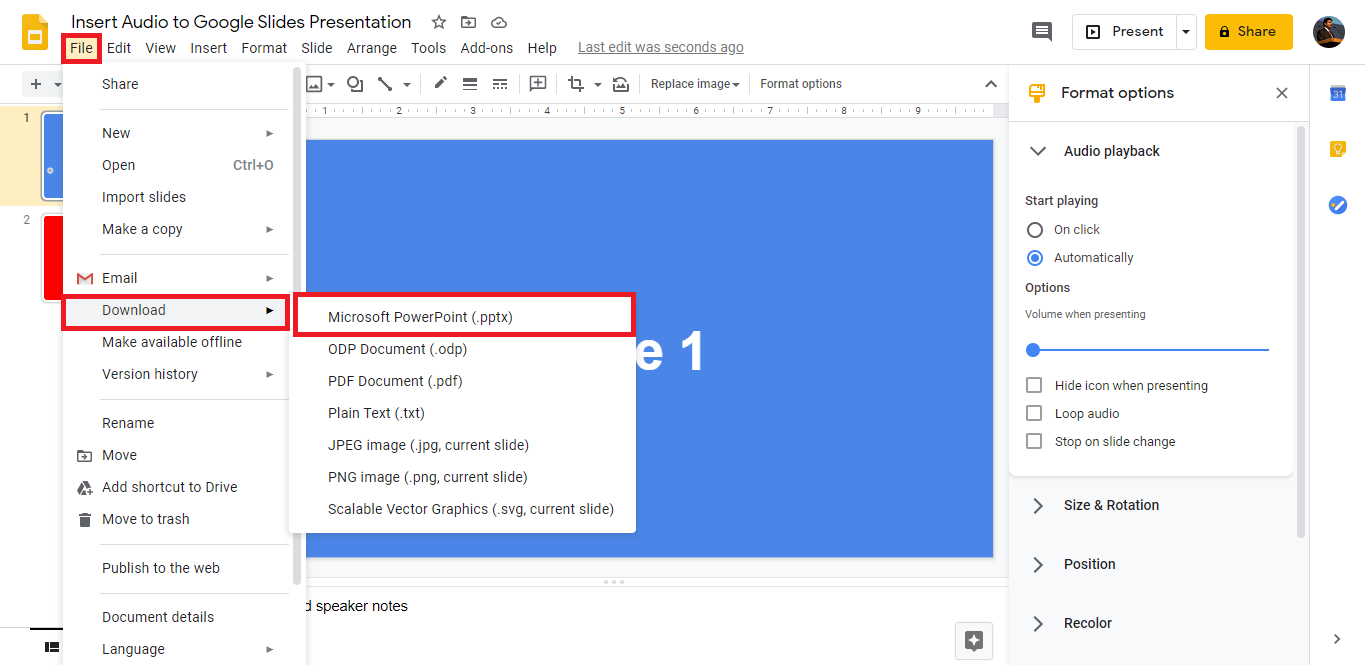
Google Slides gives you an option to save your presentation on your computer as a PowerPoint file. This can be done by clicking the File menu > Download > Microsoft PowerPoint (.pptx).
However, there is a potential problem with this type of exportation: Any audio that you insert to your Google Slides presentation will be displayed as a hyperlink in the PowerPoint version, as shown below:
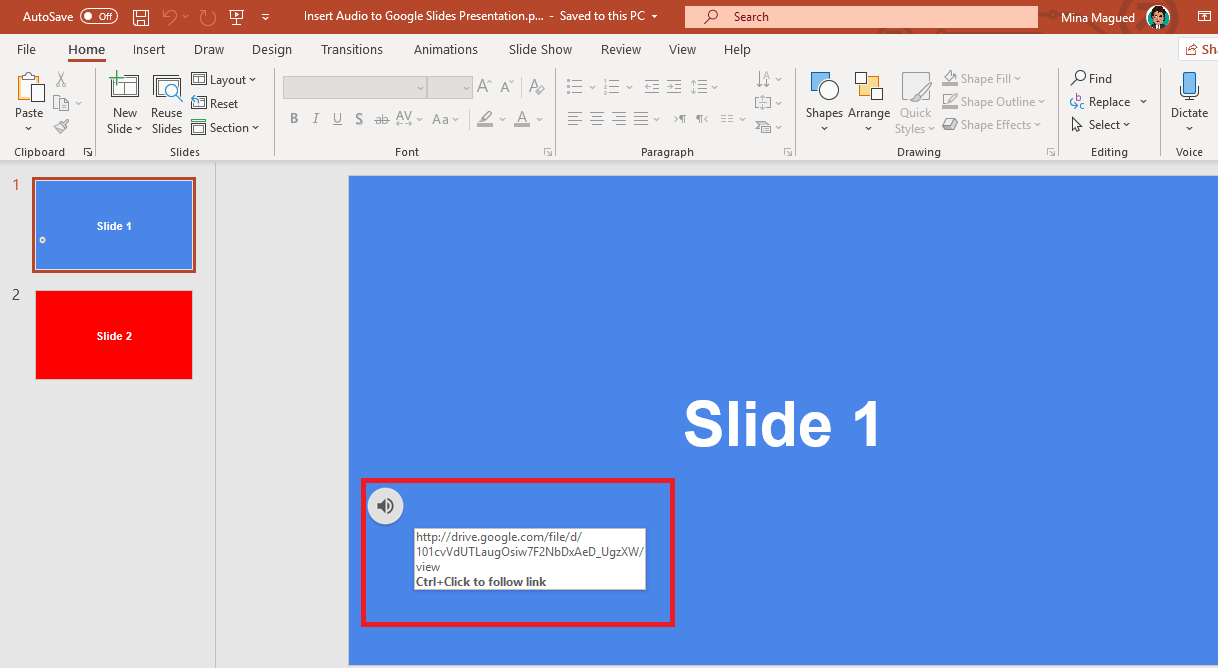
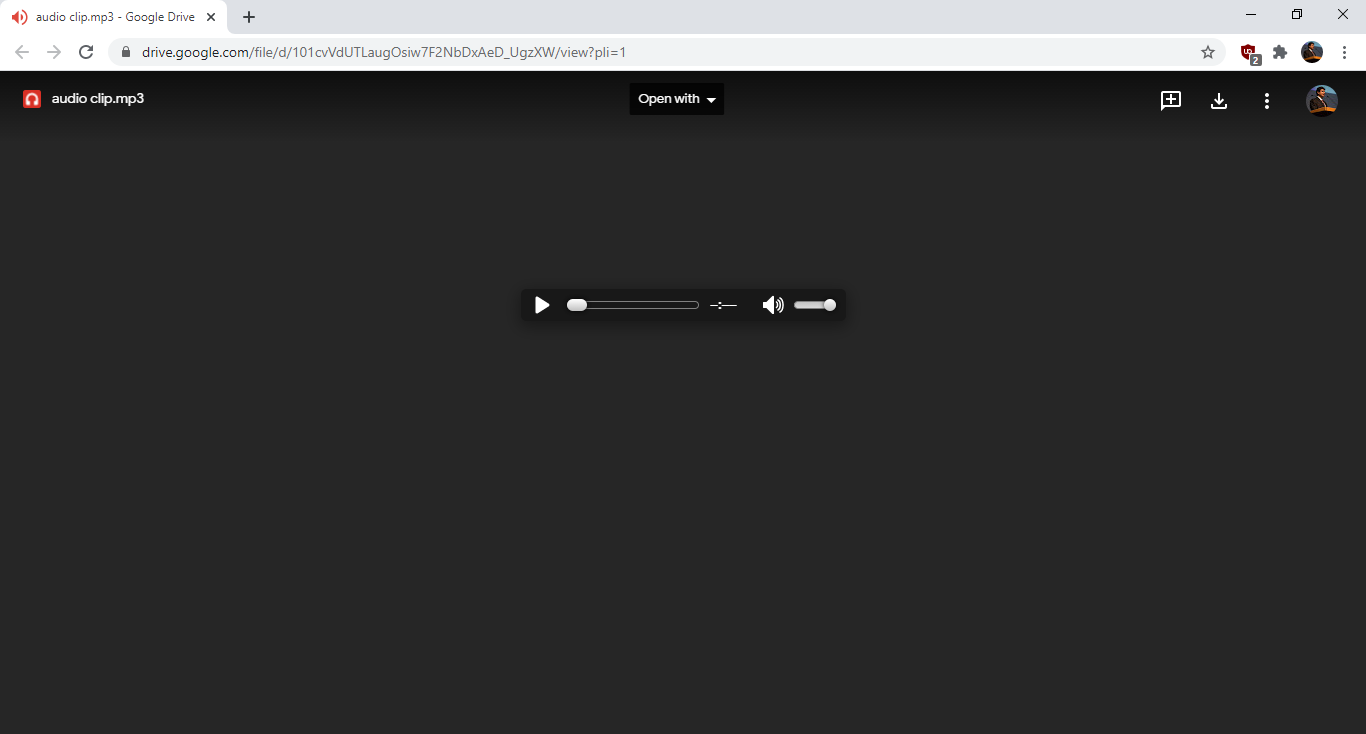
This means you will not be able to play the audio inside the offline presentation. If you click the speaker icon in your PowerPoint presentation, you will be redirected to the audio file in your browser where you can play it outside of your presentation.
Step 6: Best settings for specific situations
In this section, we will recommend some settings that will be convenient in various situations: Narration: If you are using a continuous narrative audio across your presentation background:
- Set “Start playing” to Automatically in order to start with the very beginning of your presentation
- Set the volume to the maximum especially if it doesn’t contain music.
- Check “Hide icon when presenting”.
- Uncheck “Loop audio”, you probably don’t want to repeat what you’re saying more than once.
- Uncheck “Stop on slide change” so that the narration keeps going across the slides until the end of the presentation
Photos slideshow: If you are presenting a collection of photos and you want to keep some music in the background:
- Set “Start playing” to Automatically in order for the music to start with the beginning of your presentation
- Set the volume to a medium level so that the audience can focus more on the shown photos.
- Check “Hide icon when presenting”. You do not want a speaker icon in the middle of your photo album.
- It is probably preferable to keep the music going and not have awkward silent moments in the middle, so checking “Loop audio” would be a wise choice.
- Uncheck “Stop on slide change” to prevent cutting the music during the slideshow.
These settings can also work if you want to make a presentation, explain, and talk while having some music in the background. Just make sure the music is lower than your voice and we are sure you will rock it!